If you’ve ever pulled leftovers from the freezer only to find them dry, flavorless, or covered in ice crystals, you’re not alone. Many home cooks search for reliable food freezing techniques that actually preserve taste, texture, and nutrition—without turning meal prep into a guessing game. This article is designed to give you exactly that: clear, practical guidance on how to freeze foods the right way, which ingredients freeze best, and how to avoid common mistakes that lead to waste.
We’ve reviewed culinary best practices, food safety guidelines, and chef-backed kitchen methods to ensure the advice here is accurate and easy to apply. Whether you’re batch-cooking for the week, storing seasonal produce, or saving leftovers, you’ll learn how to lock in freshness, prevent freezer burn, and reheat meals so they taste just as good as the day you made them.
Fresh groceries often promise vibrant meals, yet too frequently they wilt in the crisper before you can cook them. So how do you keep flavor locked in? Start by understanding targeted food freezing techniques that preserve texture and nutrients.
- Blanch vegetables for 2–3 minutes to deactivate enzymes that cause color and flavor loss (USDA).
- Flash-freeze berries on a tray to prevent clumping and cell damage.
- Portion proteins airtight to avoid freezer burn, which occurs when moisture evaporates.
Moreover, cool soups before sealing to limit ice crystals. Ultimately, your freezer becomes a flavor vault, not a graveyard. Flavor stays bright longer.
The Universal Principles of Perfect Freezing
By mastering the art of freezing and storing food the right way, you can preserve the nutrients of your meals and ensure that the wholesome recipes from our article on Healthy Food Ttbskitchen stay fresh and delicious longer.
Freezing isn’t just tossing leftovers into the cold abyss and hoping for the best. It’s science. And a little strategy.
Cool It Down Completely
Hot food vs. cooled food isn’t a small detail—it’s the difference between preservation and sabotage. Putting hot food straight into the freezer raises the internal temperature, partially thaws nearby items, and forms large ice crystals that wreck texture. (Ever reheated soup that turned oddly grainy?) Let it cool first; your freezer isn’t a blast chiller.
The Enemy Is Air
Air exposure vs. airtight sealing determines whether your meal tastes fresh or “freezer-burned.” Freezer burn is dehydration plus oxidation—oxygen pulls moisture out and dulls flavor (USDA). Compare methods:
- Vacuum sealers: Maximum air removal, best long-term storage.
- Water displacement with zip-top bags: Budget-friendly and effective.
- Manual pressing: Better than nothing, but less precise.
Choose the Right Container
Rigid plastic vs. freezer bags vs. glass jars:
- Rigid plastic: Ideal for liquids; prevents spills.
- Freezer bags: Space-saving and stackable.
- Freezer-safe glass jars: Durable, but leave headspace to prevent cracking.
Label Everything—No Exceptions
Labeled vs. mystery container? Always label with name and date. Follow first in, first out to reduce waste.
Master these food freezing techniques, and your freezer becomes a flavor time capsule—not a culinary gamble.
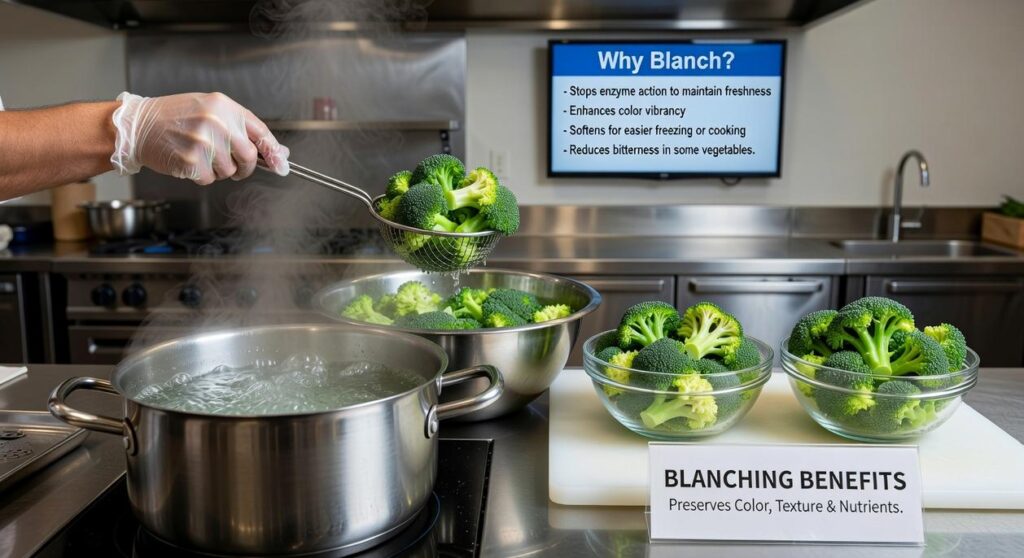
The Blanching Secret: Locking in Color, Texture, and Nutrients

Blanching sounds technical, but it’s simple: briefly scald vegetables in boiling water, then plunge them into an ice bath to stop the cooking process. That rapid cooling halts heat exposure immediately (think of it as hitting the pause button).
So why is it non‑negotiable? First, blanching stops enzyme activity—natural chemical reactions inside vegetables that cause flavor, color, and texture loss over time. According to the National Center for Home Food Preservation, these enzymes continue working even in the freezer unless deactivated. Second, it cleans the surface of dirt and organisms while brightening color.
Here’s the quick guide:
- Bring a large pot of water to a rolling boil.
- Add vegetables—broccoli for 3 minutes, green beans for 2.
- Transfer immediately to an ice bath for the same duration.
After draining, you can use food freezing techniques confidently. And if you’re missing ingredients, explore smart substitutions for common cooking ingredients to keep cooking smoothly.
A Category-by-Category Guide to Flawless Freezing
Freezing food isn’t just about tossing leftovers into the icebox and hoping for the best (we’ve all committed that crime). Done right, it’s one of the smartest food freezing techniques for saving money, reducing waste, and future-proofing dinner.
Fruits & Berries: The Flash-Freeze Method
First, spread fruit in a single layer on a baking sheet and freeze until solid. Then transfer to a bag. This prevents clumping, so you can grab a handful for smoothies or muffins without chiseling apart an icy brick. Think of it like giving each berry its own VIP seat—no overcrowding, no drama.
Meats, Poultry & Fish: The Double-Wrap Technique
Air is the enemy here. Wrap portions tightly in plastic wrap or butcher paper, then seal inside a freezer bag. This double barrier reduces freezer burn (those dry, grayish patches caused by air exposure). Some argue a single bag works fine. Sometimes it does—but if you’ve ever thawed chicken that tasted like your freezer smells, you know better.
Soups, Stews & Sauces: Portion for Convenience
Freeze liquids flat in zip-top bags to save space. Alternatively, pour into muffin tins or ice cube trays for single servings. Once frozen, transfer to a container. It’s meal prep that feels almost futuristic—like something out of The Jetsons.
- Freeze flat for stackable storage
- Label with date and contents
- Leave headspace for expansion
Baked Goods (Breads & Cakes): Preserve Freshness
Cool completely before wrapping tightly in plastic wrap, then foil. Trapped steam leads to sogginess (and heartbreak). Thaw at room temperature while still wrapped to retain moisture.
Herbs: The Olive Oil Method
Finely chop herbs, place in ice cube trays, and top with olive oil before freezing. These flavor-packed cubes melt beautifully into sauces—like culinary confetti ready to party on command.
The “Do Not Freeze” List: Foods That Don’t Survive the Chill
“I froze the lettuce to save it,” my neighbor once told me. “Why did it turn into soup?”
High-water-content produce like lettuce, cucumber, and celery are mostly water. When frozen, that water forms large ice crystals that rupture cell walls. Once thawed, the structure collapses into a limp, mushy mess (think soggy sci‑fi alien vegetation). According to the USDA, freezing causes textural damage in delicate produce due to ice crystal formation.
“I thought my creamy soup would be fine,” a friend insisted. Not quite. Dairy-based sauces and creamy soups separate because fat and water split during freezing, leaving a grainy texture. It’s chemistry, not bad luck.
Fried foods? “They’ll crisp back up,” someone always says. They won’t. Moisture seeps into the coating, destroying crunch and turning crisp crusts oily and sad.
And whole raw eggs in shells—don’t. The liquid expands, cracks the shell, and invites bacteria. Even the best food freezing techniques can’t fix that.
From Freezer to Plate: The Art of Thawing
We’ve all done it—stared at a rock-solid chicken breast at 6 p.m. and felt that spike of dinner panic. Why didn’t I take this out sooner?
The Best Method: Thawing in the Refrigerator
Thawing in the fridge keeps texture intact and temperatures safe (below 40°F, per USDA). It requires planning, but so is rubbery meat.
The Faster Method: Cold Water Bath
Seal it tight, submerge in cold water, change water every 30 minutes.
The “In a Pinch” Method: Microwave Defrosting
Only if cooking immediately.
• Respect basic food freezing techniques.
• Patience beats shortcuts.
Keep Your Ingredients Fresh and Your Meals Stress-Free
You came here looking for smarter ways to preserve your food, reduce waste, and make your kitchen routine easier. Now you understand how proper storage, portioning, and food freezing techniques can lock in flavor, protect texture, and save you time during busy weeks.
The real frustration isn’t just spoiled leftovers—it’s wasted money, last-minute meal stress, and ingredients that don’t taste as good as they should. When you use the right freezing methods, you take control of your kitchen instead of reacting to it.
Now it’s time to put this into action. Start labeling, portioning, and applying these food freezing techniques to your next batch of meals. If you want more chef-level kitchen strategies, flavor-packed breakdowns, and practical hacks trusted by thousands of home cooks, explore our latest guides and start transforming the way you cook today.