If you’ve ever ended up with mushy rice, undercooked quinoa, or bland farro, you’re not alone. Mastering cooking grains perfectly is one of the most searched kitchen challenges—and for good reason. Grains are the foundation of countless meals, from quick weekday bowls to elevated dinner party dishes, yet small missteps in timing, ratios, or seasoning can completely change the result.
This article is designed to give you clear, practical guidance you can use immediately. We break down essential techniques, ideal water-to-grain ratios, flavor-building strategies, and simple troubleshooting tips so you can get consistent results every time. Beyond the basics, you’ll also discover flavor profiles and smart kitchen hacks that turn everyday grains into standout dishes.
Our guidance is rooted in tested culinary methods, hands-on kitchen trials, and insights drawn from professional cooking standards—so you can trust that each tip is practical, reliable, and built for real home kitchens. Let’s make every pot of grains your best one yet.
Unlock the Hidden Potential in Every Grain
Grains too often land on the plate bland, mushy, and forgettable—the side character in a culinary sitcom.
This guide fixes that. You’ll learn the simple, professional techniques behind cooking grains perfectly, turning rice, quinoa, and farro into flavorful headliners worthy of a Top Chef finale.
These aren’t guarded chef secrets; they’re accessible home-kitchen hacks that deliver CONSISTENT results.
We’ll cover:
- Toasting grains for deeper flavor (like popcorn at the movies)
- Salting water properly for distinct, fluffy texture
Expect clear steps, real-world timing tips, and texture cues so every pot hits MAIN CHARACTER ENERGY.
The First Step to Flavor: Why Toasting is Non-Negotiable
Before a single drop of water hits the pot, flavor begins with heat. Toasting grains triggers the Maillard reaction—a chemical process where amino acids and natural sugars transform under heat, creating deeper, nuttier, more complex flavors (the same magic that browns steak or crusty bread). In other words, you’re building flavor from the ground up.
How to Toast Grains
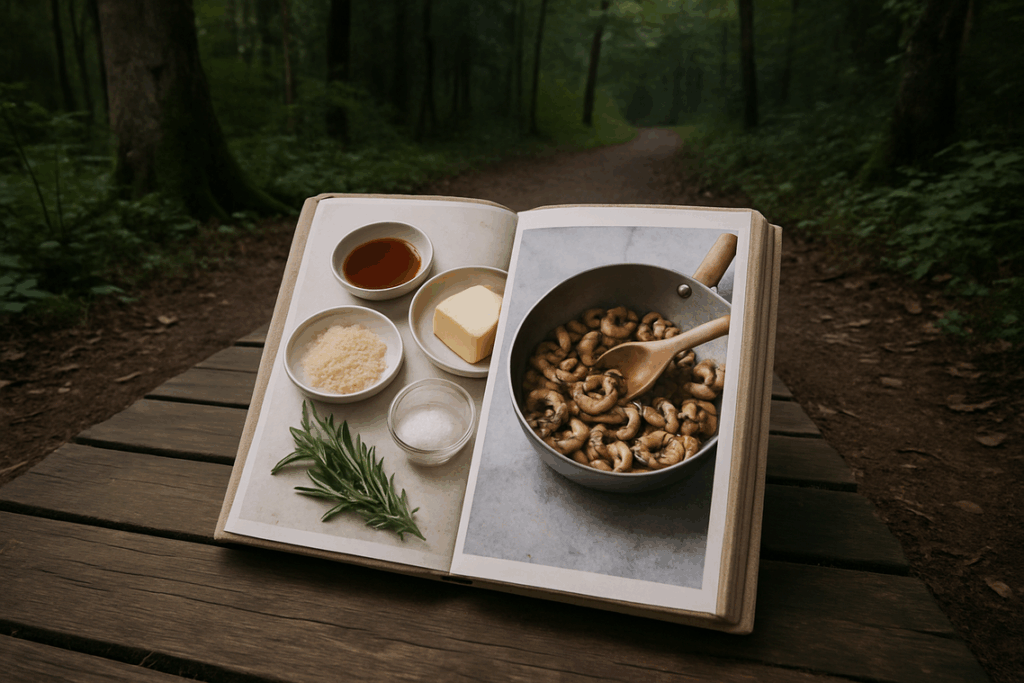
First, heat a dry skillet over medium. Then add your grain—no oil for dry-toasting—or add a teaspoon of butter or olive oil for richer depth. Stir frequently to prevent scorching. Within 3–5 minutes, the grains should smell fragrant and look lightly golden. That aroma? That’s flavor insurance for cooking grains perfectly.
Dry-toasting produces a clean, nutty profile. Toasting in fat, however, adds richness and helps seasonings cling better—a small step with a noticeable payoff.
Best Grains for Toasting
- Quinoa – enhances nuttiness and reduces bitterness
- Farro – intensifies its earthy chew
- Barley – boosts malt-like warmth
- Freekeh – deepens its smoky notes
- Rice – adds subtle popcorn-like aroma
Finally, don’t skip rinsing when needed. Quinoa contains saponin, a natural bitter coating that should be washed away. Rice benefits from rinsing too—it removes excess surface starch for fluffier, separate grains.
Beyond Water: Building a Savory Foundation with Aromatic Liquids
The Problem with Plain Water
Water hydrates. That’s it. It adds zero flavor, zero aroma, zero personality. When you use it as your default cooking liquid, you’re passing up a massive opportunity to build depth from the very first simmer. Some argue that water keeps flavors “clean” and neutral. Fair. But neutral can quickly become bland—especially in rice, quinoa, or farro (and no one dreams about bland grain bowls).
Back in 2021, after a month of side-by-side testing in my own kitchen, the difference was undeniable: grains cooked in broth had noticeably more complexity, even before seasoning.
The Easiest Upgrade
Swap water for broth or stock—vegetable, chicken, or mushroom. (Stock is made from bones; broth typically includes meat and vegetables, which gives it a fuller flavor.) According to culinary guidelines from the Culinary Institute of America, foundational liquids dramatically influence final taste. This one change alone moves you closer to cooking grains perfectly.
Pro tip: Choose low-sodium versions so you control the salt.
Aromatics for Infusion
Drop whole aromatics straight into the pot: smashed garlic cloves, a bay leaf, thyme sprigs, rosemary, or a wide strip of lemon peel. As they simmer, they release essential oils—volatile compounds responsible for aroma and flavor. Remove before serving unless you enjoy surprise bay leaf encounters (no judgment).
Creative Liquid Swaps
For creamy richness, use coconut milk. Deglaze toasted grains with a splash of white wine to lift browned bits (called fond). Want savory acidity? Add tomato juice.
If your knife work needs refining before all this chopping, review how to master knife skills for faster meal prep.
From Mushy to Fluffy: Mastering Perfect Grain Texture
Have you ever wondered why your rice turns sticky while restaurant grains stay light and separate? The secret to cooking grains perfectly starts with one simple principle: the right ratio.
The Ratio Is Key. Too much liquid, and you get porridge. Too little, and you scorch the pot. Try this mini-chart:
- Quinoa: 1:2
- Basmati rice: 1:1.5
- Brown rice: 1:2.5
Sound familiar when you “just eyeball” it? Precision matters because grains absorb water at predictable rates.
The ‘Don’t Peek’ Rule. Tempted to lift the lid? Every peek releases steam, dropping the temperature and interrupting even cooking. That’s how gummy patches happen.
The Critical Resting Period. After the heat goes off, let grains stand, covered, for 5–10 minutes. Why rush perfection? Resting redistributes moisture so each grain finishes steaming gently.
Finally, grab a fork, not a spoon. Gently fluff to separate, not mash. Think of it as lifting, not stirring. Ready to upgrade tonight’s side dish? Perfect texture isn’t luck; it’s method, patience, and restraint. Measure carefully, trust the process, and resist shortcuts; your future pilafs, bowls, and stir-fries will thank you with airy, distinct bites every single time. No more mushy disappointments.
The Final Flourish: Elevating Grains After They Cook
You’ve mastered cooking grains perfectly—they’re tender, separate, and gently steaming. Now comes the magic.
Enrich with Fats
Stir in a pat of butter and watch it melt into glossy silk. Drizzle high-quality olive oil for a grassy, peppery finish, or toasted sesame oil for a deep, nutty aroma that rises with the steam. The grains loosen, shimmer, and glide across the spoon (no sad, sticky clumps).
Brighten with Acid
A squeeze of lemon or lime sends a bright, citrusy perfume into the air. A splash of vinegar adds a subtle tang that sharpens every bite, balancing richness like a perfectly tuned chord.
Fold in Freshness
Add chopped parsley, cilantro, dill, or mint. The flecks of green look vibrant, smell garden-fresh, and taste alive. A pinch of citrus zest? Instant sparkle.
Add Contrasting Texture
Toss in toasted almonds, walnuts, sunflower, or pumpkin seeds for a warm, crackling crunch that makes each forkful more exciting.
Bland grains aren’t fixed by one magic trick; instead, they transform through layered technique. First, toast raw grains in a dry pan to unlock nutty aroma and deeper flavor. Next, swap water for stock, coconut milk, or tomato-infused broth—flavorful liquids that infuse every bite. Then, honor the rest period; letting grains steam off heat redistributes moisture for better texture (yes, patience pays). Finally, fold in fresh herbs, citrus zest, or toasted seeds for contrast. This is the practical framework behind cooking grains perfectly. Explore more tips at TTBS Kitchen, and try just one upgrade tonight—you’ll taste the difference immediately.
Bring Confidence Back to Your Kitchen
You came here because inconsistent textures, mushy rice, or undercooked quinoa have been ruining meals that should have been simple. Now you understand the techniques, timing, and small adjustments that make all the difference in cooking grains perfectly every single time.
When your grains turn out light, fluffy, and flavorful, everything else on the plate improves. No more second-guessing water ratios. No more sticky disasters. Just reliable, repeatable results that elevate your everyday dishes.
The next step is simple: put these techniques into practice tonight. Start with one grain, follow the method, and taste the difference for yourself. If you’re ready to eliminate guesswork for good, explore our proven kitchen guides and flavor breakdowns that thousands of home cooks rely on daily.
Stop settling for average meals. Master your grains, transform your cooking, and make every dish feel intentional starting now.