I’ve spent years watching home cooks buy tools they never use.
You probably have a drawer full of gadgets right now. Maybe you bought them with good intentions. But you don’t know what to actually make with them.
Here’s the truth: the right tool only matters if you know the right recipe to use it on.
I see this all the time. Someone buys a mandoline or a Dutch oven and it sits there collecting dust. Not because the tool is bad. Because they never learned which dishes actually need it.
This guide connects your kitchen supplies to recipes that make sense. No more guessing what to do with that immersion blender or why you need a certain pan.
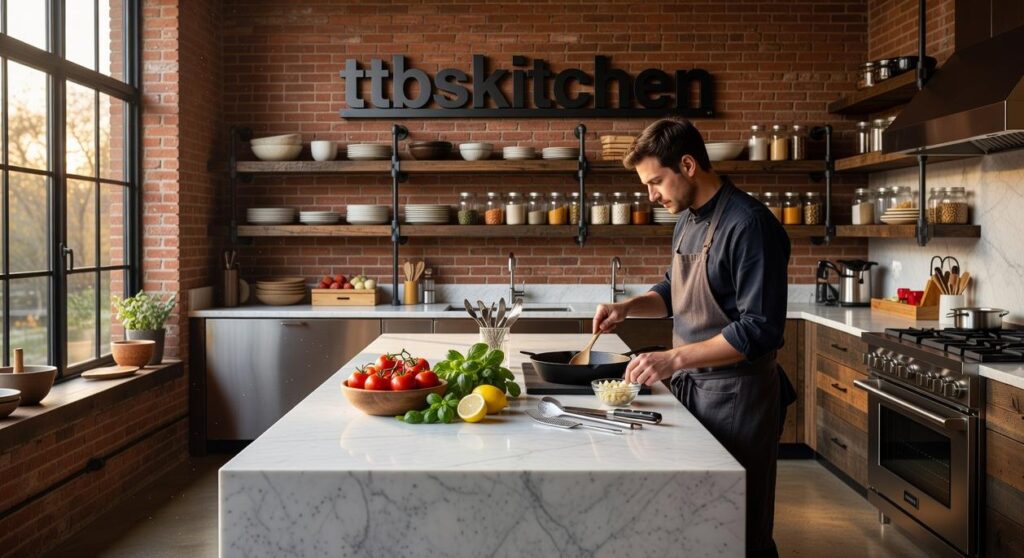
At ttbskitchen, we test everything in real home kitchens. We figure out which tools actually earn their counter space and which recipes show you how to use them right.
You’ll learn how specific equipment unlocks specific techniques. And how those techniques turn into dishes that taste like you know what you’re doing.
Every tool has a job. Every recipe teaches you something about flavor.
That’s how cooking is supposed to work.
The Core Arsenal: 5 Essential Supplies for 90% of Recipes
Walk into any professional kitchen and you’ll see walls of equipment.
But here’s what most home cooks don’t realize. You don’t need all that stuff.
I’m going to be straight with you. Five tools will handle almost everything you cook. That’s it.
Some chefs will tell you that you need specialty knives for every task and a different pan for each cooking method. They’ll say you can’t make good food without a full batterie de cuisine (that’s French for “way too much kitchen gear”).
But that’s not how real cooking works at home.
The truth is simpler. Most recipes use the same basic tools over and over. Once I figured this out, my cooking got better because I stopped fumbling through drawers looking for the “right” gadget.
Let me break down what actually matters.
The 8-Inch Chef’s Knife
This is your workhorse. You’ll use it for chopping onions, dicing vegetables, and mincing garlic. It handles about 80% of your knife work.
The 8-inch length gives you enough blade to work fast without feeling unwieldy. Anything smaller and you’re sawing through ingredients. Anything bigger and your hand gets tired.
The 12-Inch Cast Iron Skillet
If my chef’s knife is my right hand, this skillet is my left.
Cast iron holds heat better than almost any other material. That means when you drop a cold steak into the pan, the temperature doesn’t plummet. You get actual searing instead of steaming.
I use mine for everything from cornbread to pan-roasted chicken. It goes from stovetop to oven without complaint.
The Heavy-Bottomed Stock Pot
This is where soups and stews happen.
The key word here is heavy-bottomed. A thin pot creates hot spots that burn whatever touches the bottom. A good stock pot distributes heat evenly across the entire base.
You need this for boiling pasta, making stock, or cooking anything with liquid for more than a few minutes.
The Large Cutting Board
Here’s something nobody talks about. A small cutting board is dangerous.
When you’re working on a tiny surface, ingredients fall off the edges. Your knife slips. You end up cutting toward your hand because there’s no room to work properly.
Get a board that gives you space. Wood or plastic both work fine, but make sure it doesn’t slide around your counter.
The Digital Kitchen Scale
Baking is chemistry. And chemistry requires precision.
A cup of flour can weigh anywhere from 120 to 150 grams depending on how you scoop it. That difference ruins cakes.
A scale removes the guesswork. You measure by weight and get consistent results every time. At Ttbskitchen, I use mine for both baking and portion control when I’m testing recipes.
That’s the foundation. Everything else is extra.
Recipe & Supply Pairing: The Perfect Sear
You’ve probably cooked a steak that looked gray instead of golden brown.
Or maybe you got a nice crust but the inside was overcooked and chewy.
I used to have the same problem. I’d follow recipes to the letter and still end up with mediocre results. Then I figured out what I was missing.
It wasn’t my technique. It was my pan.
The Essential Supply: Cast Iron Skillet
Here’s what makes cast iron different.
It holds heat like nothing else. When you drop a cold steak onto a thin pan, the temperature crashes. The meat steams instead of sears.
Cast iron doesn’t do that. It stays hot enough to trigger the Maillard reaction (that’s the chemical process that creates those deep, savory flavors and that beautiful brown crust).
You need sustained high heat. Cast iron gives you exactly that.
Pan-Seared Ribeye with Garlic Herb Butter
Let me walk you through how I do this at ttbskitchen.
Step 1: The Prep
Take your ribeye out of the fridge 30 minutes before cooking. Cold meat doesn’t sear well.
Pat it completely dry with paper towels. Water is the enemy here. Any moisture on the surface will steam your steak instead of searing it.
Season both sides with salt and pepper. Be generous. Most of it will form the crust you’re after.
Step 2: The Technique
Heat your cast iron over medium-high until it’s smoking. I mean actually smoking.
Add a thin layer of oil with a high smoke point. I use avocado oil.
Lay the steak down away from you (so oil doesn’t splash toward you). Don’t touch it for 3 to 4 minutes. Seriously. Leave it alone.
Flip once. Another 3 to 4 minutes for medium-rare.
Step 3: The Finish
Drop in butter, smashed garlic cloves, and fresh thyme during the last minute.
Tilt the pan and spoon that melted butter over the steak repeatedly. This is called basting and it adds flavor while helping the top finish cooking.
Pro Tip: After you remove the steak, let the pan cool slightly. Wipe it out with a paper towel while it’s still warm. Add a tiny bit of oil and rub it in with another paper towel. This builds up that non-stick seasoning over time. Never use soap unless you want to start over.
Recipe & Supply Pairing: Deep Flavor Infusion
You want flavors that stick around.
Not the kind that fade after the first bite. I’m talking about the deep, rich taste that makes people ask what you did differently.
Here’s what most home cooks get wrong. They think flavor comes from fancy ingredients or secret spices.
It doesn’t.
Real depth comes from TIME and the right tool.
Some chefs say you can braise in any heavy pot. Just use what you have, they’ll tell you. And sure, you might get something edible.
But here’s what they’re not saying.
Without proper heat distribution, you get hot spots. Your meat cooks unevenly. The bottom burns while the top stays tough.
That’s where a Dutch oven changes everything.
The heavy construction (usually cast iron) holds heat like nothing else. It keeps temperatures STABLE whether you’re on the stovetop or in the oven. No wild temperature swings that wreck your braise.
Let me show you how this works with red wine braised short ribs.
Step 1: The Foundation
You start by browning the ribs hard. I mean REALLY brown them. That caramelization on the bottom of the pot? That’s called fond, and it’s pure flavor.
Then you sauté your mirepoix (that’s just onions, carrots, and celery) in the same pot.
Step 2: The Technique
Pour in some red wine and scrape up all that fond from the bottom. This is deglazing, and it’s how you capture every bit of flavor you built. Add your braising liquid and bring it to a simmer.
Step 3: The Magic
Cover it. Slide it into a 300°F oven. Then walk away for three hours. I put these concepts into practice in What Country Have the Healthiest Recipes Ttbskitchen.
The low and slow heat breaks down the connective tissue in those tough short ribs. What starts out chewy becomes fall-apart tender.
Pro Tip: If your Dutch oven has an enamel-coated interior, you’re getting a bonus. The enamel won’t react with acidic ingredients like wine and tomatoes. That means your flavors stay clean and bright instead of picking up metallic notes.
This is what ttbskitchen is all about. Pairing the right tool with the right technique so you actually get results.
Not complicated. Just effective.
Kitchen Hacks: Small Supplies with a Big Impact
You don’t need fancy equipment to cook better.
I’m serious. Walk into most home kitchens and you’ll see expensive stand mixers collecting dust while people struggle with basic tasks.
Here’s what actually makes a difference.
A few cheap tools that work harder than anything else in your drawer.
Now, some chefs will tell you that skill matters more than tools. They’ll say a good cook can make magic with just a knife and a pan. And sure, there’s truth to that.
But why make things harder than they need to be?
The right small tool can change how you cook. Not because it’s expensive or complicated. Because it does one thing really well.
Three Tools That Actually Matter
The Microplane Grater
This thing costs about ten bucks and does work that nothing else can match.
I use mine for citrus zest, fresh ginger, and turning parmesan into these light, fluffy clouds that melt on contact. (Try it on a Lemon & Parmesan Risotto and you’ll see what I mean.)
It’s not just for cheese. That’s what most people miss.
The Bench Scraper
You know that moment when you’re trying to scoop chopped onions off your cutting board and half of them end up on the floor?
Yeah, this fixes that.
But it does more. I use it to divide dough, clean my workspace in one swipe, and move ingredients from board to pan without the mess. For what ttbskitchen focuses on, this tool is gold.
The Fish Spatula
Don’t let the name fool you.
This thin, slotted spatula slides under anything delicate without tearing it apart. Fried eggs, pancakes, roasted vegetables. All the things that usually stick or break when you try to flip them.
The flexibility is what makes it work.
Pro tip: Use your bench scraper to smash garlic cloves before mincing. Faster prep and the garlic releases more flavor.
Your Kitchen, Upgraded
I get it. You bought the tools but you’re not sure what to do with them.
Your kitchen drawers are full of gadgets that seemed like good ideas at the time. Now they just sit there while you make the same five meals on repeat.
The problem isn’t your equipment. It’s knowing which tool works best for what dish.
I created ttbskitchen to bridge that gap. Each recipe I share connects directly to the supplies that make it work.
You don’t need more stuff. You need to know how to use what you already have (or what’s actually worth buying).
This guide pairs specific recipes with the exact tools they need. When you make pan-seared steak with the right pan, you’ll taste the difference immediately.
You came here to turn your kitchen supplies into real meals. Now you know how.
Building your skills and your equipment collection happens at the same time. One recipe teaches you both.
Start with one pairing. Try the pan-seared steak and see what the right supply actually does for your cooking.
Then explore our other guides. Each one shows you another way to put your kitchen to work.
Your tools are ready. Now you are too.