

You’ve heard of the beef wellington dish, right? It sounds fancy, maybe even a bit intimidating. You’re wondering if it’s worth the hype, or maybe you’ve just been dying to master it yourself.
Either way, you’re in the right place. Trust me, I’ve been cooking long enough to know what’s daunting in a kitchen and what’s just a matter of practice.
Now, why should you care about this dish? It’s a showstopper. A centerpiece for any dinner party that screams sophistication.
But beneath the puff pastry and tender beef lies a rich history and a technique that’s surprisingly approachable with the right guidance. You’re curious about how to get that perfect pastry seal or how to keep the beef juicy, aren’t you?
That’s exactly what we’re diving into here. With takeaways from culinary experts, this article will break down the mystery. By the end, you’ll have the confidence to tackle this gourmet delight.
Deconstructing the Wellington: Layers of Flavor
You know Beef Wellington (it’s) that fancy dish that makes everyone drool. But what really makes it tick? Let’s break it down: start with a perfectly seared beef tenderloin.
Next, wrap it up in a mushroom duxelles. I love using shiitake or cremini for a twist. Add a layer of prosciutto (or go wild with a high-quality pâté).
Finally, seal the deal with a flaky puff pastry. Each layer works together like a dream. Moisture gets locked in, flavors meld, and textures dance on your tongue.
But here’s where the ‘Wellington-style’ fun begins. Modern chefs have put their own spin on it. Some use a savory crepe to keep things juicy.
Others switch mushrooms depending on what’s fresh. Even the wrap layer has options. Why stick to tradition when creativity tastes so good?
Understanding these elements isn’t just for chefs. It’s for anyone who wants to know the ‘why’ behind a recipe. Speaking of culinary mastery, check out the masterclass bouillabaisse perfection for another dish breakdown.
Ever tried a Wellington variation or is that still on your bucket list? Either way, it’s a delicious journey worth taking.
The Foundation: Selecting Your Core Ingredients
Let’s get straight to it: the beef is the star of any beef wellington dish. You want a center-cut beef tenderloin. Why?
It’s all about that uniform thickness. Even cooking is key, and nothing beats its tenderness. Asking your butcher for a trimmed and tied piece is important.
Don’t be shy; make sure to check the marbling. Those little lines of fat mean flavor.
Now, onto the duxelles. Fancy name, but it’s just a mix of finely chopped mushrooms, shallots, and herbs. Cook it till it’s almost dry.
Trust me, the last thing you want is a soggy pastry. Cremini mushrooms are my go-to. They’re easy to find and pack a punch.
Plus, they won’t break the bank.
Let’s talk pastry. All-butter puff pastry is non-negotiable. Why?
Flavor and texture. Shortening-based pastries just don’t cut it. They lack that rich, buttery taste.
Sure, making pastry from scratch is noble, but who has the time? High-quality store-bought works wonders and saves you a headache.
Here’s a pro tip: handle the pastry as little as possible. Overworking it will ruin the layers. You want a flaky, golden crust that complements the tender beef inside.
Putting it all together isn’t rocket science, but it’s about respect for each component. You can’t skimp on quality here. This dish is about harmony (like a perfectly tuned orchestra).
Each ingredient plays its part. You’ll taste the difference.
So, are you ready to conquer the beef wellington? It’s not just a meal; it’s an experience. Give it the love and attention it deserves.
You’ll see why these choices matter when you take that first bite.
Beef Wellington: Step-By-Step Guide
Let’s cut to the chase. Building a beef wellington dish sounds fancy, but it breaks down into straightforward steps. Here’s the plan.
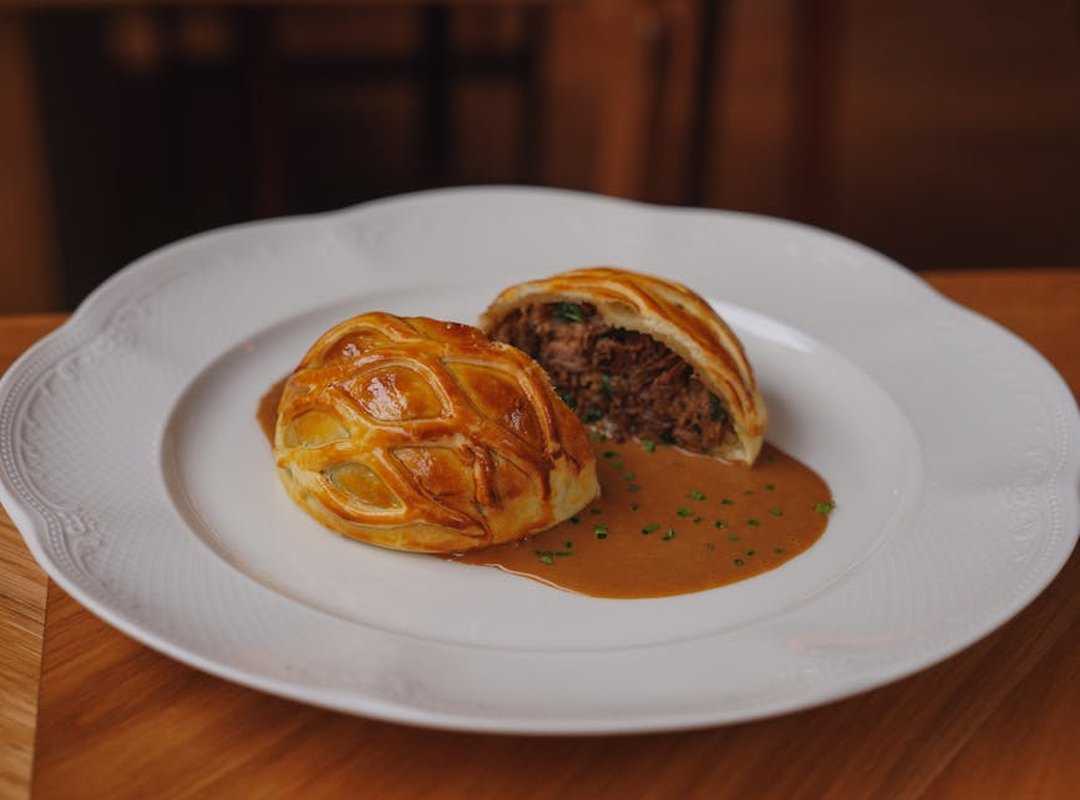
Step 1: The Sear. Start with the beef. You want a deep brown crust on all sides (deep, like your love for a good steak). Season it well and sear it in a hot pan. This isn’t the time to be timid. Sear like you’ve never seared before. Once you’ve got that crust, chill it. Seriously, let it cool completely in the fridge. It’s not just a suggestion, it’s key.
Step 2: The Wrap. Lay out some plastic wrap. Layer slices of prosciutto in a neat rectangle. Spread the cooled duxelles (a fancy mushroom paste) over it. Place the chilled beef right in the center. The idea is to make a meat blanket.
Step 3: The Roll. Use the plastic wrap to roll it all into a tight log. You want uniformity here. This step’s all about precision. The log needs to chill for at least 30 minutes. Trust me, it’s key to getting that perfectly round shape we all chase. (Like a culinary version of rolling sushi, but with beef.)
Step 4: The Pastry Encasement. Roll out your puff pastry. Brush the edges with egg wash. Wrap the chilled beef log, trimming any excess pastry. Seal the seams tightly. A loose seam is a sad seam, you know?
Step 5: The Finishing Touches. Score the top with a lattice pattern. Why? It looks professional, plus it’s extra credit for visual appeal. Brush with egg wash for that golden-brown finish everyone loves. One more chill session, then you’re ready to bake.
Now, it’s all about timing. Pop it in the oven and let the magic happen. Once it’s golden and puffed, you’re done.
Curious about other layered dishes? Check out analyzing layers of tiramisu to dive into another culinary masterpiece.
Pro tip: Make sure everything stays cold until it hits the oven. This isn’t just about patience, it’s science (and it makes you look like a genius).
There you have it. A beef Wellington made easy when you break it down and just go for it.
From Oven to Table: Mastering Beef Wellington
Does the thought of a soggy beef wellington dish keep you up at night? It shouldn’t. The secret is simple: a very dry duxelles.
Dry it like your life depends on it. Chilling the beef at every stage is another non-negotiable (just do it). And for heaven’s sake, start with a high oven temperature to set the bottom crust.
Trust me, you don’t want to bite into mush.
Now, let’s talk temperature. You need a meat thermometer. No guessing here.
Aim for 120-125°F if you want rare, or 130-135°F for medium-rare. Anything else and you’re just rolling the dice.
Why let the meat rest? It’s science. Those juices need to redistribute, or you’ll end up with a flood on your plate.
Give it 10-15 minutes.
Finally, slicing. A sharp serrated knife is your best friend. No one wants crushed pastry (it’s tragic).
These steps will transform that daunting beef wellington into a dish you’ll be proud to serve. Afraid? Don’t be.
You’ve got this.
Serve It Up with Confidence
Feeling daunted by a beef wellington dish? That’s old news. Forget the fear of failure.
You’ve got the perfect guide now. Stick to quality ingredients, manage moisture, and nail those temperatures. Achieve a flawless result every time.
Who wouldn’t want to impress at their next holiday dinner or special gathering? The solution is right here. Save this guide, use it, trust it.
And why stop there? Explore more gourmet recipes to keep leveling up your kitchen game. You’re in control now.
Got questions or need more tips? Head over to ttbskitchen.com and keep your culinary journey thriving.